Contents
One of the many features of Adobe Experience Platform (AEP) Web SDK is the ability to send data to multiple platforms with one implementation. You can send data to AEP Real Time Customer Profile, Adobe Analytics, Adobe Target, and even some third party platforms, with one server request using one data format. In this post I will be sending data to Adobe Analytics.
Here are the steps I’m going to follow.
- Create an XDM schema. (The format for my data.)
- Create a Datastream. (Configure the edge network server which forwards data to Adobe Analytics.)
- Install Web SDK. (Via a tag manager like Adobe Launch or directly.)
- Populate XDM and send events via Web SDK.
- Map XDM to Adobe Analytics. (eVars, props, events)
Create an XDM Schema
An XDM schema is a format for your data – and it’s supposed to be platform agnostic. In other words the format of your data should reflect the events, data attributes, dimensions, etc, from your website, and not be tied to a specific analytics platform. Adobe Analytics uses “eVars” but no other platform knows what this means. Your XDM schema should be able to be used by many platforms now and in the future. At the heart of it, an XDM schema is just a definition / dictionary for the data sent to Adobe Experience Platform.
To create a schema head to the Adobe Data Collection interface and select Schemas from the left side menu.
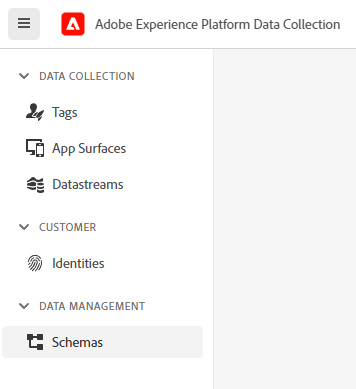
From there you should see a menu similar to the one below.

Web SDK is designed to send website event data, records of something happening on a website at a certain time. This means the XDM schema used to collect these events should be of the ExperienceEvent class. A class is the first building block of a schema and ExperienceEvent is an out-of-the-box core class provided by Adobe. A class can provide some default fields to a schema, such as the ExperienceEvent class shown below.
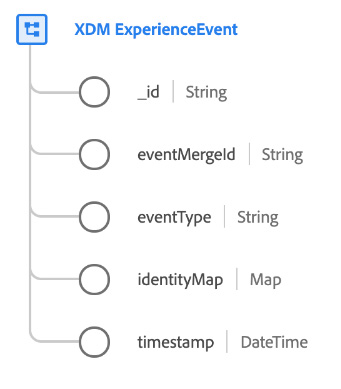
After creating a new schema of ExperienceEvent class I am going to add a Field Group. This is a bunch of defined fields, and you can create your own too.

I’ve searched for “web sdk” as there is a good Field Group created by Adobe specifically for Web SDK events. The schema creation interface is quite good. Have a play around, search for new Field Groups, and preview those Field Groups.
Adobe Analytics Fields
Given this post is about sending data to Adobe Analytics I wanted to talk a little about the relationship between XDM and Analytics. Your XDM schema is platform agnostic BUT there are some XDM fields which – if present on a data event – will be mapped into Adobe Analytics automatically. For example if your XDM schema contains the “web.webPageDetails.name” field, then Analytics will automatically assign the value of this field to the Page dimension. That’s quite helpful and is another reason to use this Field Group. There is a full list of automatically mapped fields provided by Adobe.
If your website has products or commerce features then I recommend the Commerce Field Group which contains the commerce object and the productListItems array. The commerce object has a number of automatically mapped fields related to commerce events, and the productListItems array is automatically mapped into the product string in Adobe Analytics.
For now I’m going to go ahead with the “AEP Web SDK ExperienceEvent” field group and the “Commerce” field group and make my XDM schema.
Create a Datastream
A Datastream is a configuration of the Adobe Edge Network. This is what tells the Edge Network to forward data to your Adobe Analytics report suite.
Web SDK Events -> Edge Network -> Adobe Analytics
You can find Datastreams in the Adobe Launch interface, in the side menu just like schemas.
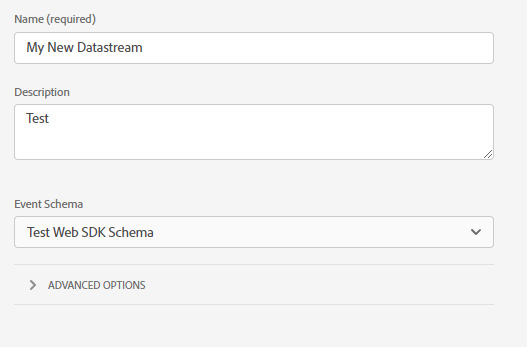
Be sure to choose your schema you created in Step 1. After you’ve created a Datastream you need to add a service to it, and in this case that means Adobe Analytics. This will allow the Datastream to forward data to your chosen report suite.
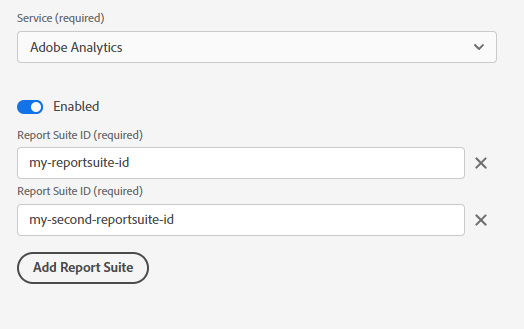
You will be provided with a Datastream ID. This ID is used by Web SDK later to make sure that events are sent to the correct Datastream.
Tip: Create a non-production Datastream for your testing/staging website environments too.
Install Web SDK
Events with data are sent from a website to your newly created Datastream and this is achieved with AEP Web SDK. You can install Web SDK via a tag manager like Adobe Launch (aka Adobe Data Collection Tags) or Google Tag Manager or Ensighten Manage. You can also install Web SDK directly to the site as it’s a JavaScript library. I’ve written two blog posts on setting up Web SDK via Adobe Launch so check those out.
In my examples today I am going to use the direct JavaScript custom code method. You could inject this custom code with a tag manager too.
Base Code / Script
The base JavaScript installs Web SDK and is required on every page, ideally near the top of the page.
<script>
  !function(n,o){o.forEach(function(o){n[o]||((n.__alloyNS=n.__alloyNS||
  []).push(o),n[o]=function(){var u=arguments;return new Promise(
  function(i,l){n[o].q.push([i,l,u])})},n[o].q=[])})}
  (window,["alloy"]);
</script>
<script src="https://cdn1.adoberesources.net/alloy/2.6.4/alloy.min.js" async>
</script>
Note that the above script creates a new object “alloy” (you can change the name if required) and loads a JS file. In the example above I am loading version 2.6.4 of the Web SDK code.
Configure
After the base script above, you need to configure the instance of Web SDK with the configure command.
alloy("configure", {
  "edgeConfigId": "insert_datastream_id_here",
  "orgId":"insert_adobe_org_id_here"
});
This bit of code sets up Web SDK to send events to a particular Datastream. This is where you insert your Datastream ID from Step 2. There are a few other options to use with this command too, but for now I’ll continue with the default settings. The only required fields are shown above.
Sending Events
To send an event use the below command.
alloy("sendEvent", {
  "xdm": {
    /* your XDM format data here */
  }
});
This is the core of Web SDK. The above command sends your XDM format data to your configured Datastream which will then forward the data to Adobe Analytics.
Populate Data and Send Events
Now that we know how to send events, we need some data to send. Let’s test it out.
alloy("sendEvent", {
  "xdm": {
    "web": {
      "webPageDetails": {
        "name": "example page name",
        "pageViews": {
            "value": 1
        }
      }
    }
  }
});
If I run the above code then Web SDK will send an event to my Datastream. I have only populated two fields in my schema above, however Web SDK automatically adds and populates some fields from the “AEP Web SDK ExperienceEvent” Field Group we are using. To test the actual XDM sent check the network tab in your browser. Filter for “/ee” to find the request to your Datasteam. Note the configId query parameter, which should match your Datastream ID.
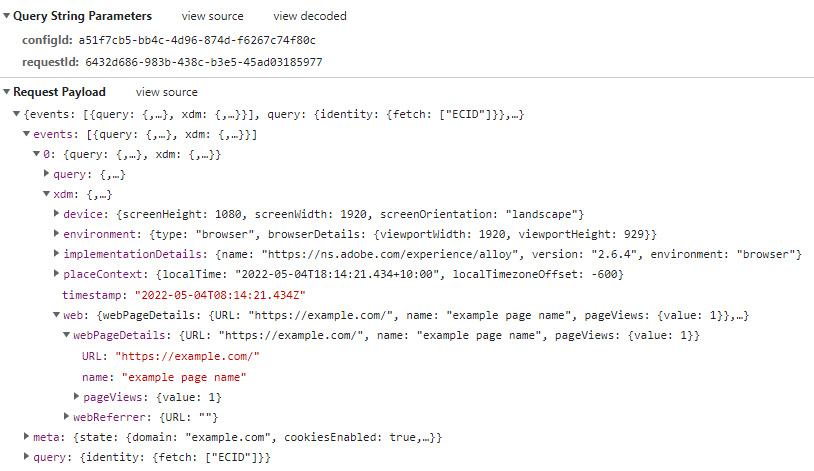
Check it out! That’s quite a few fields. Of course in the real world we need to fetch data from different places (like our data layer) and construct our XDM object.
var digitalData = {
    "page": {
        "name": document.location.pathname === "/" ? "home" : document.location.pathname
    }
}

var myXDM = {
    "web": {
        "webPageDetails": {
            "name": digitalData.page.name,
            "pageViews": {
                "value": 1
            }
        }
    }
}

alloy("sendEvent", {
  "xdm": myXDM
});
This example is no more ‘real world’ than the first one, but you get the idea. Grab your data, construct your XDM object, send your event. This can be achieved in many different ways depending on the website.
Map XDM to Adobe Analytics
Now we are getting closer to seeing the results! We have events going to our Datastream and hopefully they are being forwarded to our Adobe Analytics report suite. Since we are using the “AEP Web SDK ExperienceEvent” Field Group we are sending some XDM data which Adobe Analytics maps automatically. For example the “web.webPageDetails.name” value is automatically interpreted as the Page dimension.
There are a couple ways to test this. You can open up Adobe Analytics Real Time Report and view incoming data to your report suite. This will show you limited data as it comes in to the report suite itself. There is also a nice feature of the AEP Debugger Chrome extension that can help. You will need to sign in to the debugger with your Adobe credentials first, then access Tools > Logs > Edge.
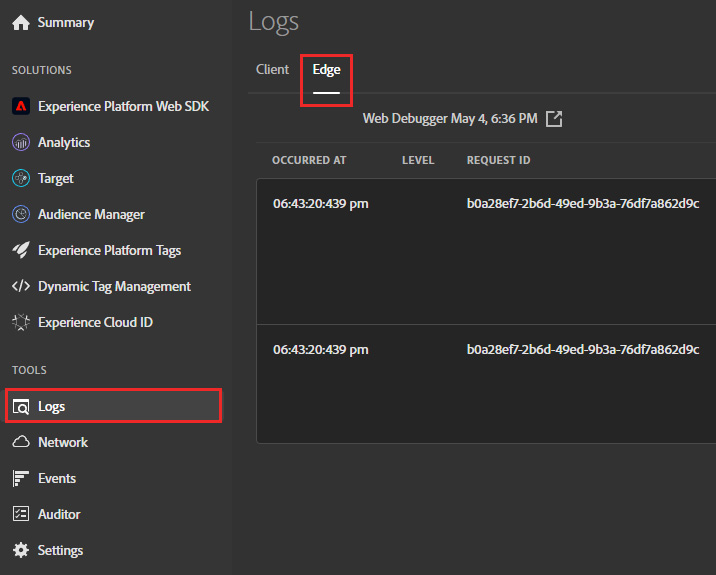
If you are signed in you’ll be presented with a button to connect and start a debug session. This interface shows you events as they are received by your Datastream and then forwarded on to services. One of the great things it does is show you the automatic mapping of fields to the Adobe Analytics hit.
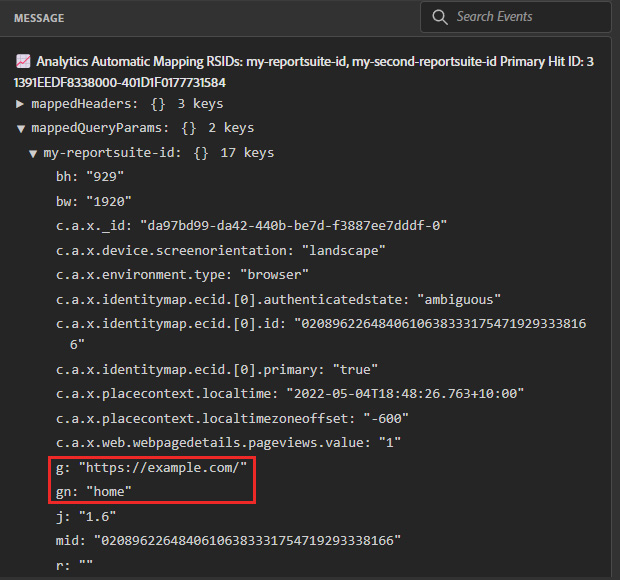
You can find the Adobe Analytics requests as they are labeled with “Analytics Automatic Mapping RSIDs” as you can see at the top. Inside the “mappedQueryParams” object is a list of your report suites, and the beacon sent to them. The example above comes from the event I sent earlier and you can see that the “g” parameter (s.pageURL) is correct and the “gn” parameter (s.pageName) is also correct – it matches what I put in my “web.webPageDetails.name” XDM field.
Those other fields there which start with “c.a.x” are my other XDM data fields. They get sent as flat context data into Adobe Analytics.
Remember to check out the Adobe docs for the rest of the automatically mapped dimensions and events.
Processing Rules
Most of the time your XDM data will have many more fields, and no doubt you will be wanting to set some custom eVars, props and events. As shown above, your XDM is flattened and sent as context data to your report suite. This context data can be mapped into eVars, props and events.

Here I’ve set eVar2 to my fictitious custom XDM field for a promotion. If I send the below event I would expect “my-awesome-promotion-id” to get populated to eVar2. Note that this requires my XDM schema to contain these fields too, as below.
var myXDM = {
    "_mycompany" : {
        "shop": {
            "promotion": {
                "name": "my-awesome-promotion-id"
            }
        }
    },
    "web": {
        "webPageDetails": {
            "name": digitalData.page.name,
            "pageViews": {
                "value": 1
            }
        }
    }
}

alloy("sendEvent", {
  "xdm": myXDM
});
The Adobe Analytics Field Group
Adobe have made it even easier to map eVars, props and events from XDM format into Adobe Analytics by creating the Adobe Analytics Field Group. This provides a heap of fields for each eVar, prop and event. For example “_experience.analytics.customDimensions.eVars.eVar1” is one of the fields, and it would map to eVar1 in Analytics without the need for any processing rules. The only caveat to mention here is that using “eVars” and “events” kind of goes against the “platform agnostic” approach of XDM. Those fields only make sense to Adobe Analytics.
Next Steps
There is much more to discuss of course, but the steps above give an overview of the process. In the next few posts I’ll talk about some strategies for using Adobe Launch to build scalable and flexible XDM objects. I also want to go into more detail about Datastreams and Data Prep which is a tool to transform, calculate, and map data as it comes into AEP.